This will show installation of the ADTR Performance rear sway bar which fits all 1992 and newer Crown Victorias, Grand Marquis, Town Cars and Marauders. These instructions assume you have a rear sway bar already. If you do not just skip ahead to Step # 5. If you don’t have a rear sway bar stock you should have purchased the rear sway bar bracket kit from the drop down menu on our webpage. You will need those brackets and hardware to install this bar. Contact Chris for more information or if you need to order after the fact!
What you’ll need:
- Properly rated drive on ramps (or jack and jack stands)
- Magnetic dish
- Liquid wrench/penetrating lubricant
- 8mm wrench / socket
- 10mm wrench / socket
- 14mm wrench / socket
Instructions:
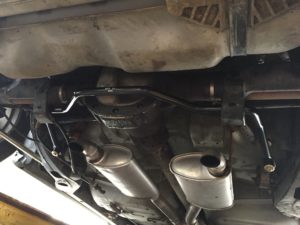
- Lift the rear of the vehicle to gain access. We recommend using appropriately rated drive on ramps for this installation but you can use a jack and jack stands. The tires do not need to be removed for this installation. However you prefer to lift the vehicle, the weight of the vehicle needs to be on the suspension.
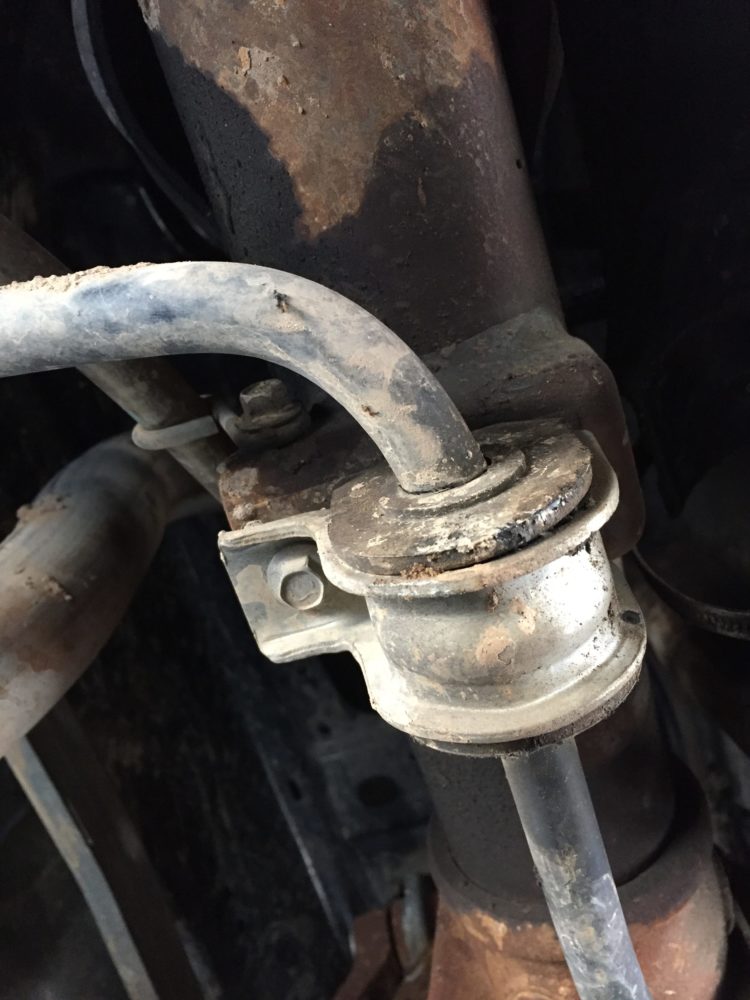
- Once the vehicle is properly lifted, locate the rear sway bar. I suggest first removing the sway bar end links (that connect the bar to the frame) and then removing the bar bushings (that hold the bar the rear end housing) Use the 10mm socket and wrench to remove the stock end links.
- Some Police Interceptors may have the fuel tank shield around the sway bar mounts and those will have to be removed. (If your model doesn’t have those, skip ahead to the bushing removal). Using the 8mm socket remove the clamps on either side of the shield and remove. The bushings and bracket should be exposed like in the second picture
 (W/ fuel tank shield)
 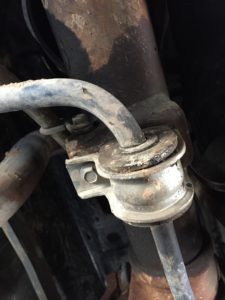 (W/O fuel tank shield)
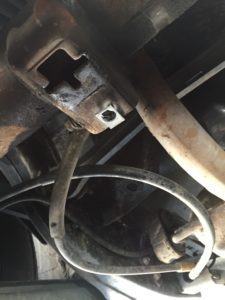
 - Now that the bar bushing is exposed, it’s time for removal. Support the bar, take the 8mm or 10mm socket (depends on year) and remove the bolts on both sides. Tilt the bracket towards the back and slide the bar forward to release the mounting tab on the back of the bracket. Remove the bar and set aside. This is what the opening in the rear end housing should look like:
- Take the supplied lube and spread evenly on the bar bushings. The bushings are split for easy installation. Slide over the bar and hold the bar up to the rear end housing with the brackets. (If you’re unsure of orientation of the bar the ADTR.net logo is up when looking at the rear end) Install the rear of the bracket first, sliding the tab into the hole and sliding all the way back.

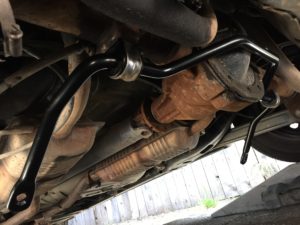
- Insert the 8mm or 10mm bolt in the front of the bracket and tighten. The bar should look like this now:
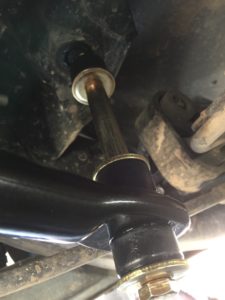
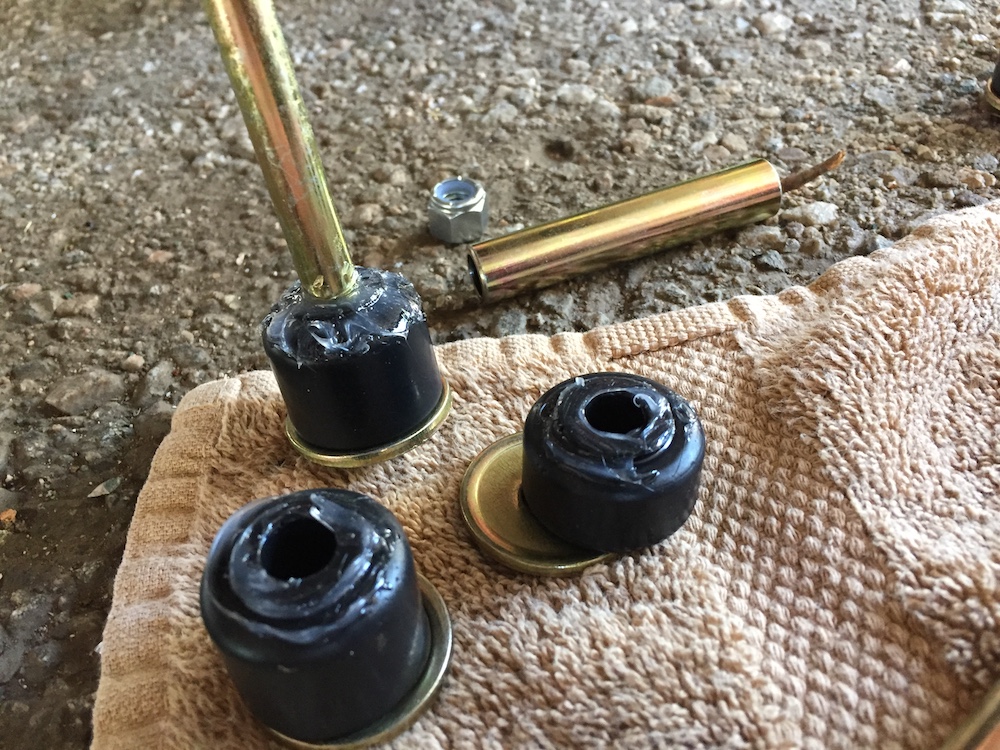
- Lube all the end link bushings (assembly line style) and pay attention to the thickness of the end link bushings. The goal is to have the rear sway bar as close to parallel to the ground as possible. By moving around the bushings and using the thicker ones in different places you can achieve different end link lengths. If your car is drastically lowered you’ll need to adjust accordingly. For this installation we put the two thicker bushings on the inside and the thinner bushings on the outside.

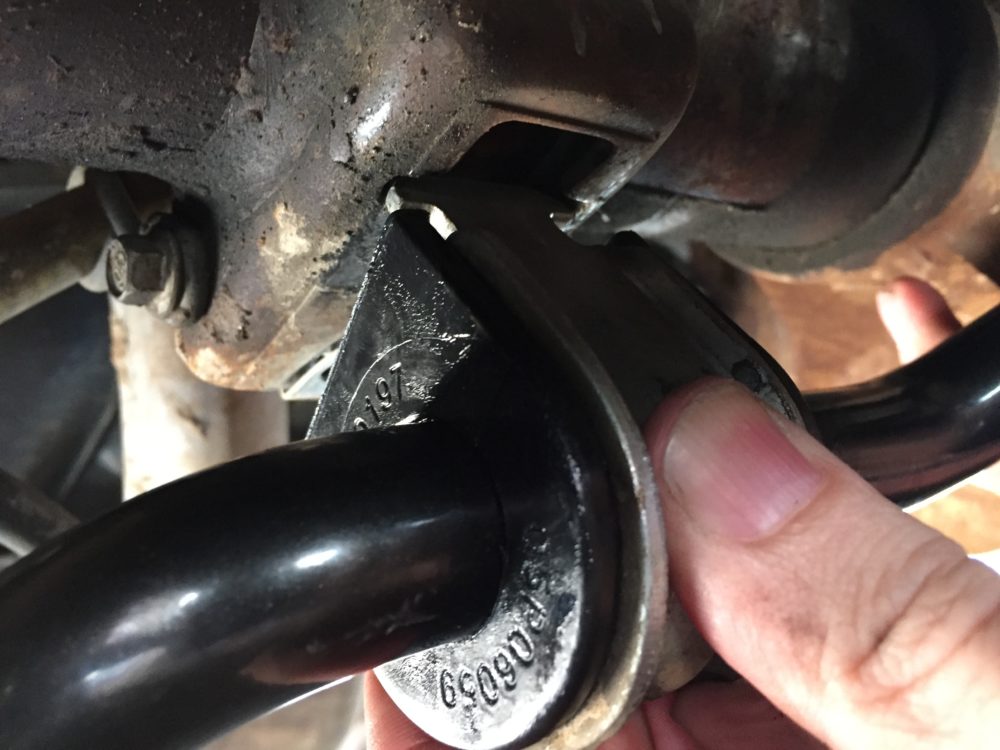
- The next step its far easier to have a friend help and do both sides at the same time. I take the bolt, put the washer and thinner bushing on, stick the bolt through the hole in the sway bar, add the thicker bushing and washer, add the sleeve, keep pushing the bolt through until you have enough room to add the washer and the other thicker bushing and then push the bolt all the way in through the hole in the frame. Take the remaining thin bushing and washer, slide over the end of the bolt and loosely thread on the lock nut. At this point the bar should be held up by the end links. Tighten the bolt/nut with the 14mm socket and wrench until you can no longer turn the center sleeve by hand.
- Check all bolts and nuts to make sure everything is tight and reinstall the fuel tank shields (if not already installed)
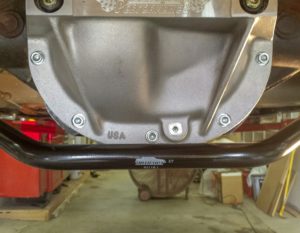
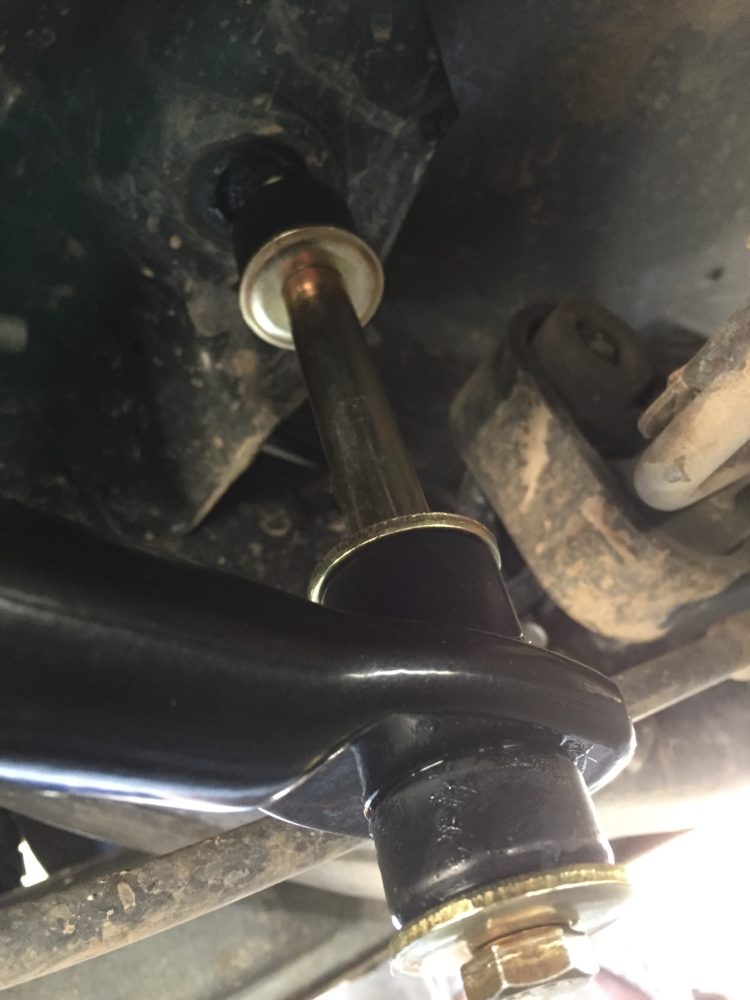
- This is what the final installation should look like
- After test driving the car, be sure to go back over all the bolts and nuts to make sure everything is still tight and nothing has shifted on the test drive.


Enjoy and as always if you have any questions please feel free to contact Chris through our Contact Us Page