This will show installation of the ADTR Performance front sway bar which fits all 1992-2002 Crown Victorias, Grand Marquis and Town Cars.
What you’ll need:
- Properly rated drive on ramps (or jack and jack stands)
- Magnetic dish
- Liquid wrench/penetrating lubricant
- 7mm wrench / socket
- 15mm wrench / socket
Instructions:
- Lift the front of the vehicle to gain access. We recommend using appropriately rated drive on ramps for this installation but you can use a jack and jack stands. The tires should not need to be removed for this installation. However you prefer to lift the vehicle, the weight of the vehicle needs to be on the suspension.
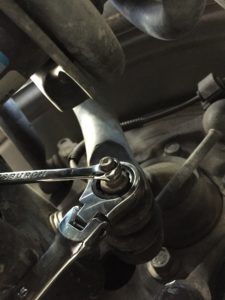
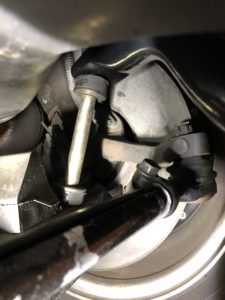
- Once the vehicle is properly lifted, locate the front sway bar. I suggest first removing the sway bar end links (that connect the bar to the spindle) and then removing the bar bushings (that hold the bar the frame) Use the 15mm wrench and 7mm wrench to remove the stock end link nuts as shown.
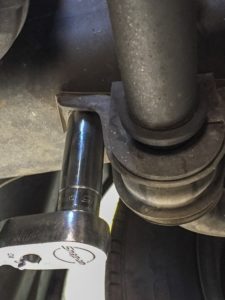
- Now that the end link nuts are removed, use the 15mm socket to remove the bar. Support the bar and remove all the nuts on both sides. Remove the bar and set aside. This is what it should look like at this point:
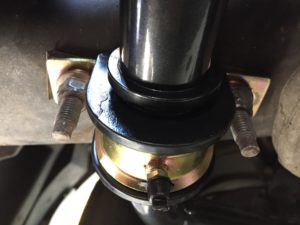
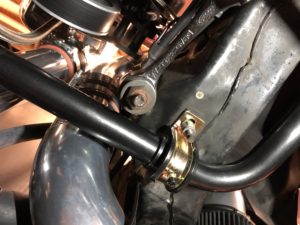
- Take the supplied lube and spread evenly on the bar bushings. The bushings are split for easy installation. Slide over the bar and hold the bar up to the frame by the brackets making sure the ends of the bar are parallel to the lower control arms. (If you’re unsure of orientation of the bar, the ADTR.net logo is up when looking at the engine)
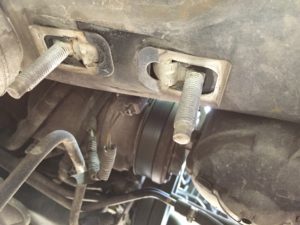
- Slide the brackets over the bushings and onto the studs on the frame. Check for clearance with the oil cooler lines and install the supplied spacer between the frame and the bushings if more clearance is needed. For this installation we didn’t require the spacers for clearance. Secure the brackets using the supplied washers and factory nuts. ADTR Performance bars come with collars to limit side to side motion. It is normal to have a little bit of room between the bushing and the collar to eliminate binding. The bar should look like this now:
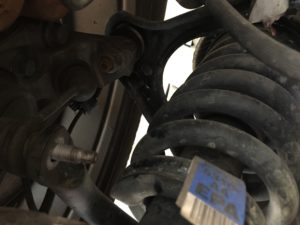
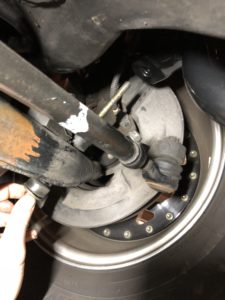
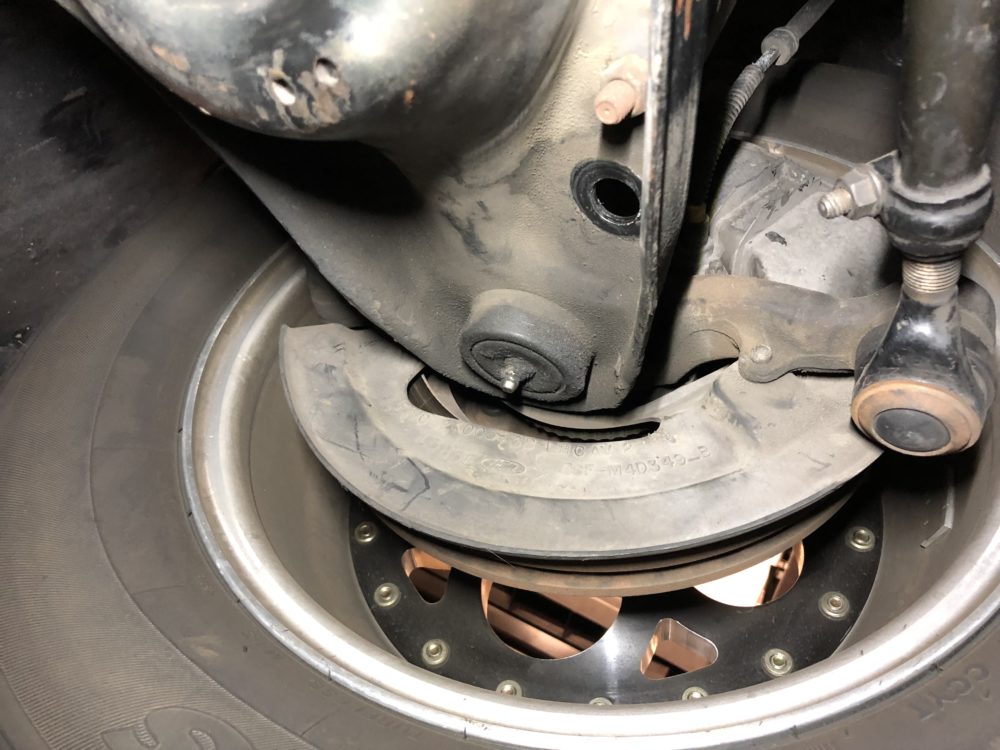
- The 92-02 front bar includes new Energy Suspension end links and you will completely remove the stock Ford end links which attach to the front spindle. You may need to remove the wheel and rotor to gain access but you can normally get creative with tools to avoid the extra disassembly.
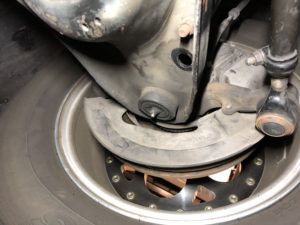
- The new end links will go through the hole on the lower control arm. We recommend lubing all bushings and inserting the bolt starting from the bottom. Your end link bushings may be multiple thicknesses. The bar needs to be as close to parallel as possible to configure the bushings to make correct.
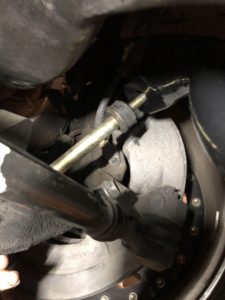
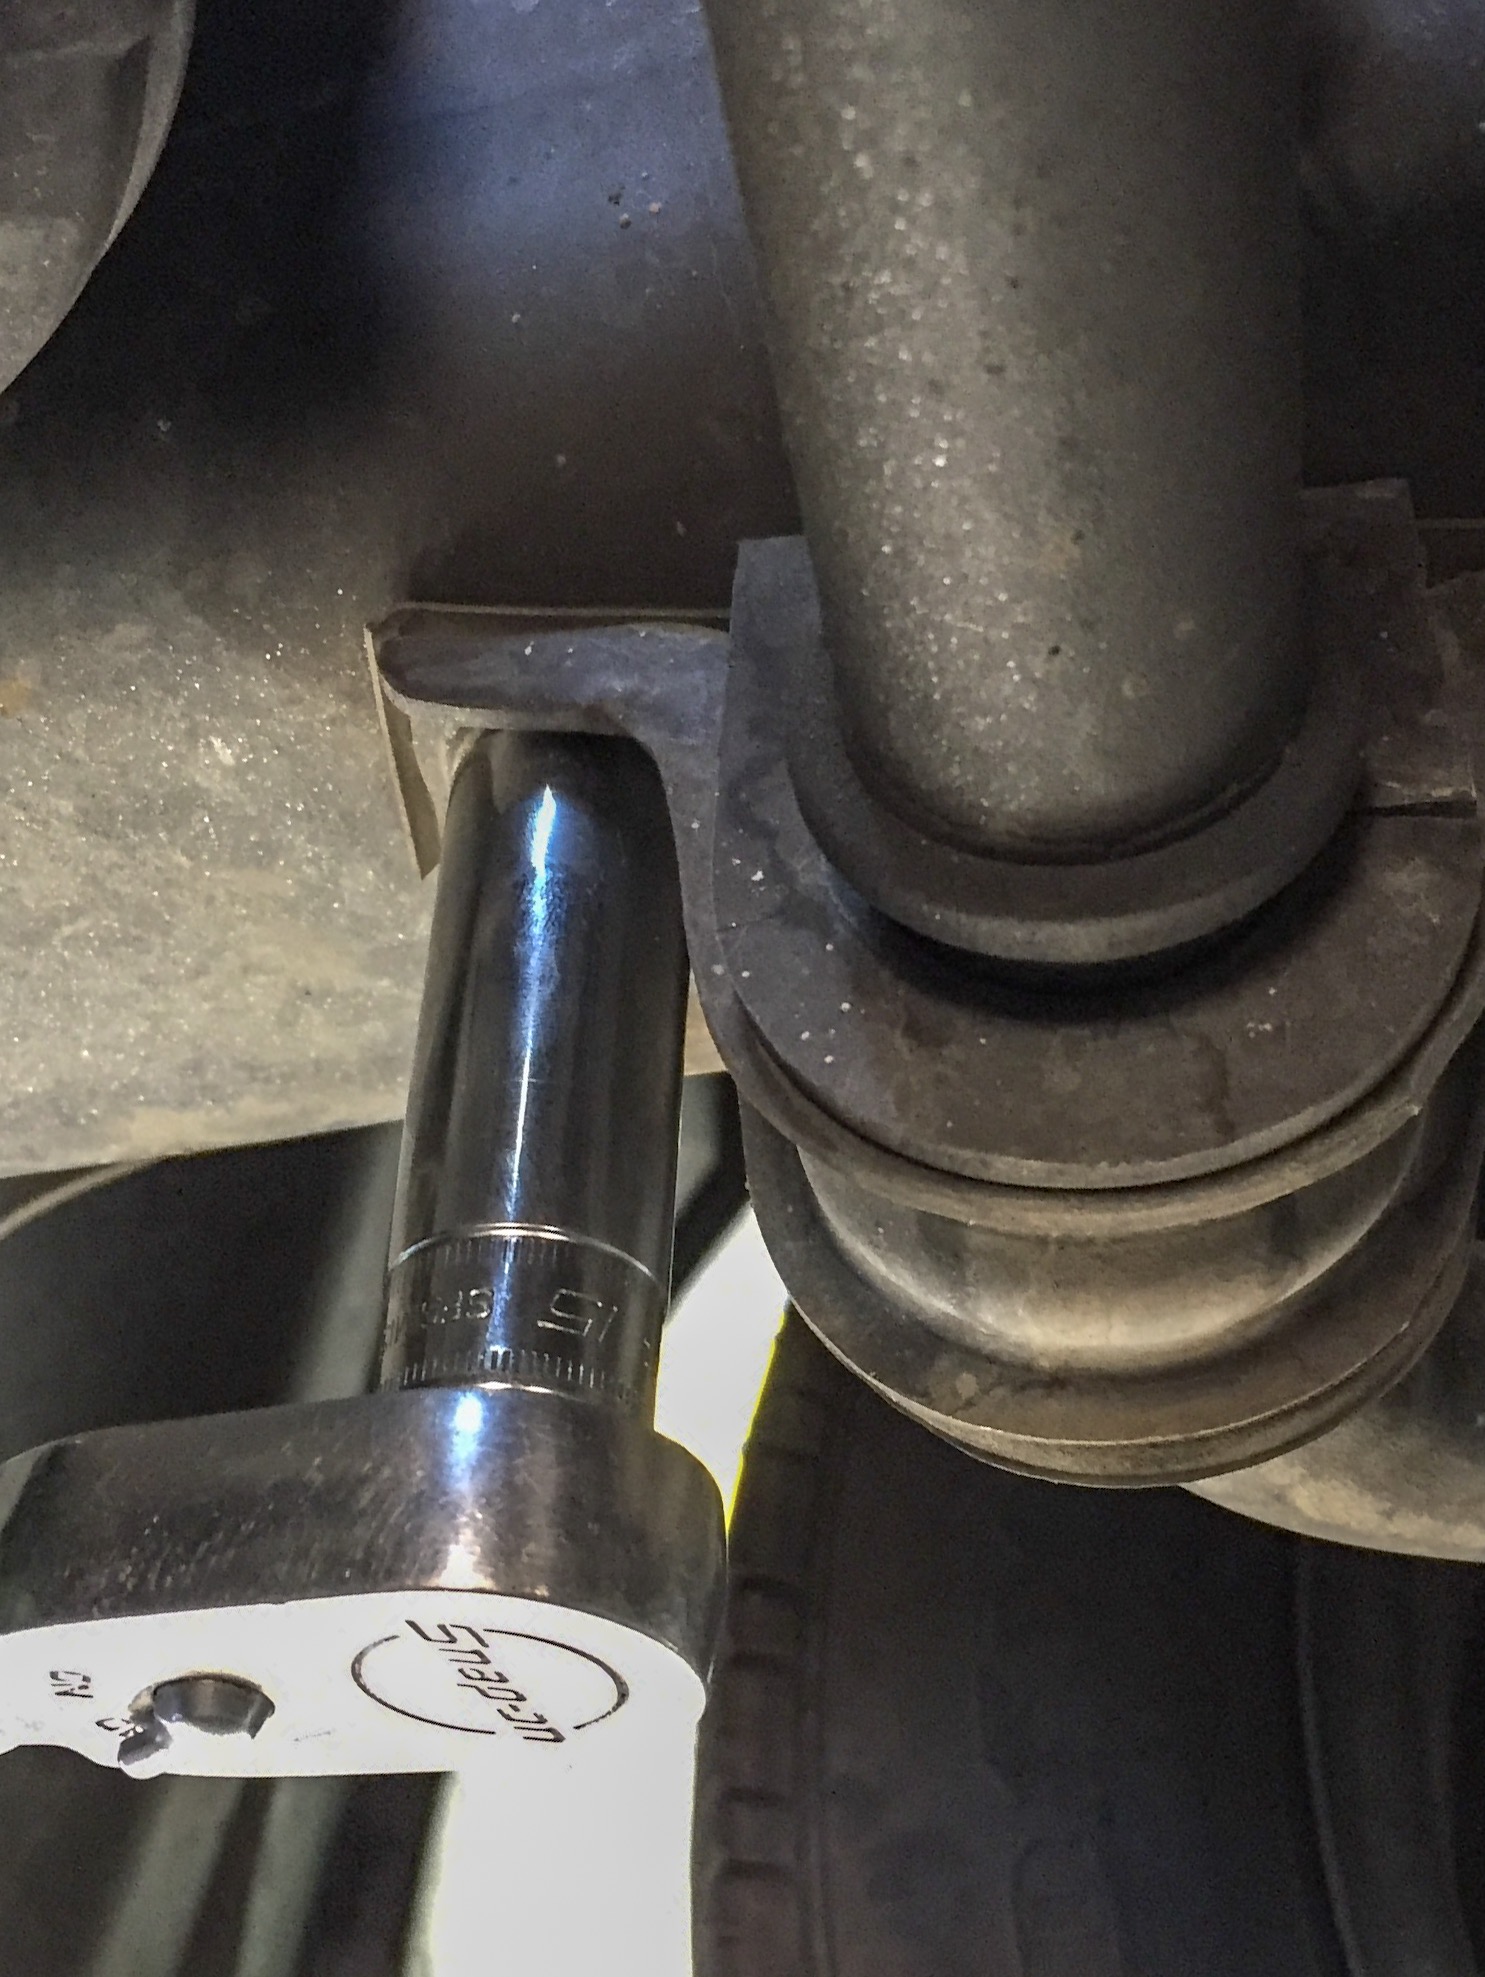
- Check all nuts to make sure everything is tight!
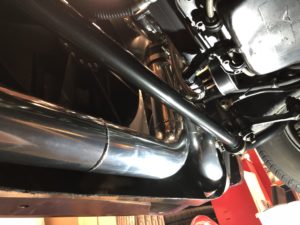
- This is what the final installation should look like
- After test driving the car, be sure to go back over all nuts to make sure everything is still tight and nothing has shifted on the test drive.


Enjoy and as always if you have any questions please feel free to contact Chris through our Contact Us Page